Creating Flows
This guide walks through building a flow from scratch.
-
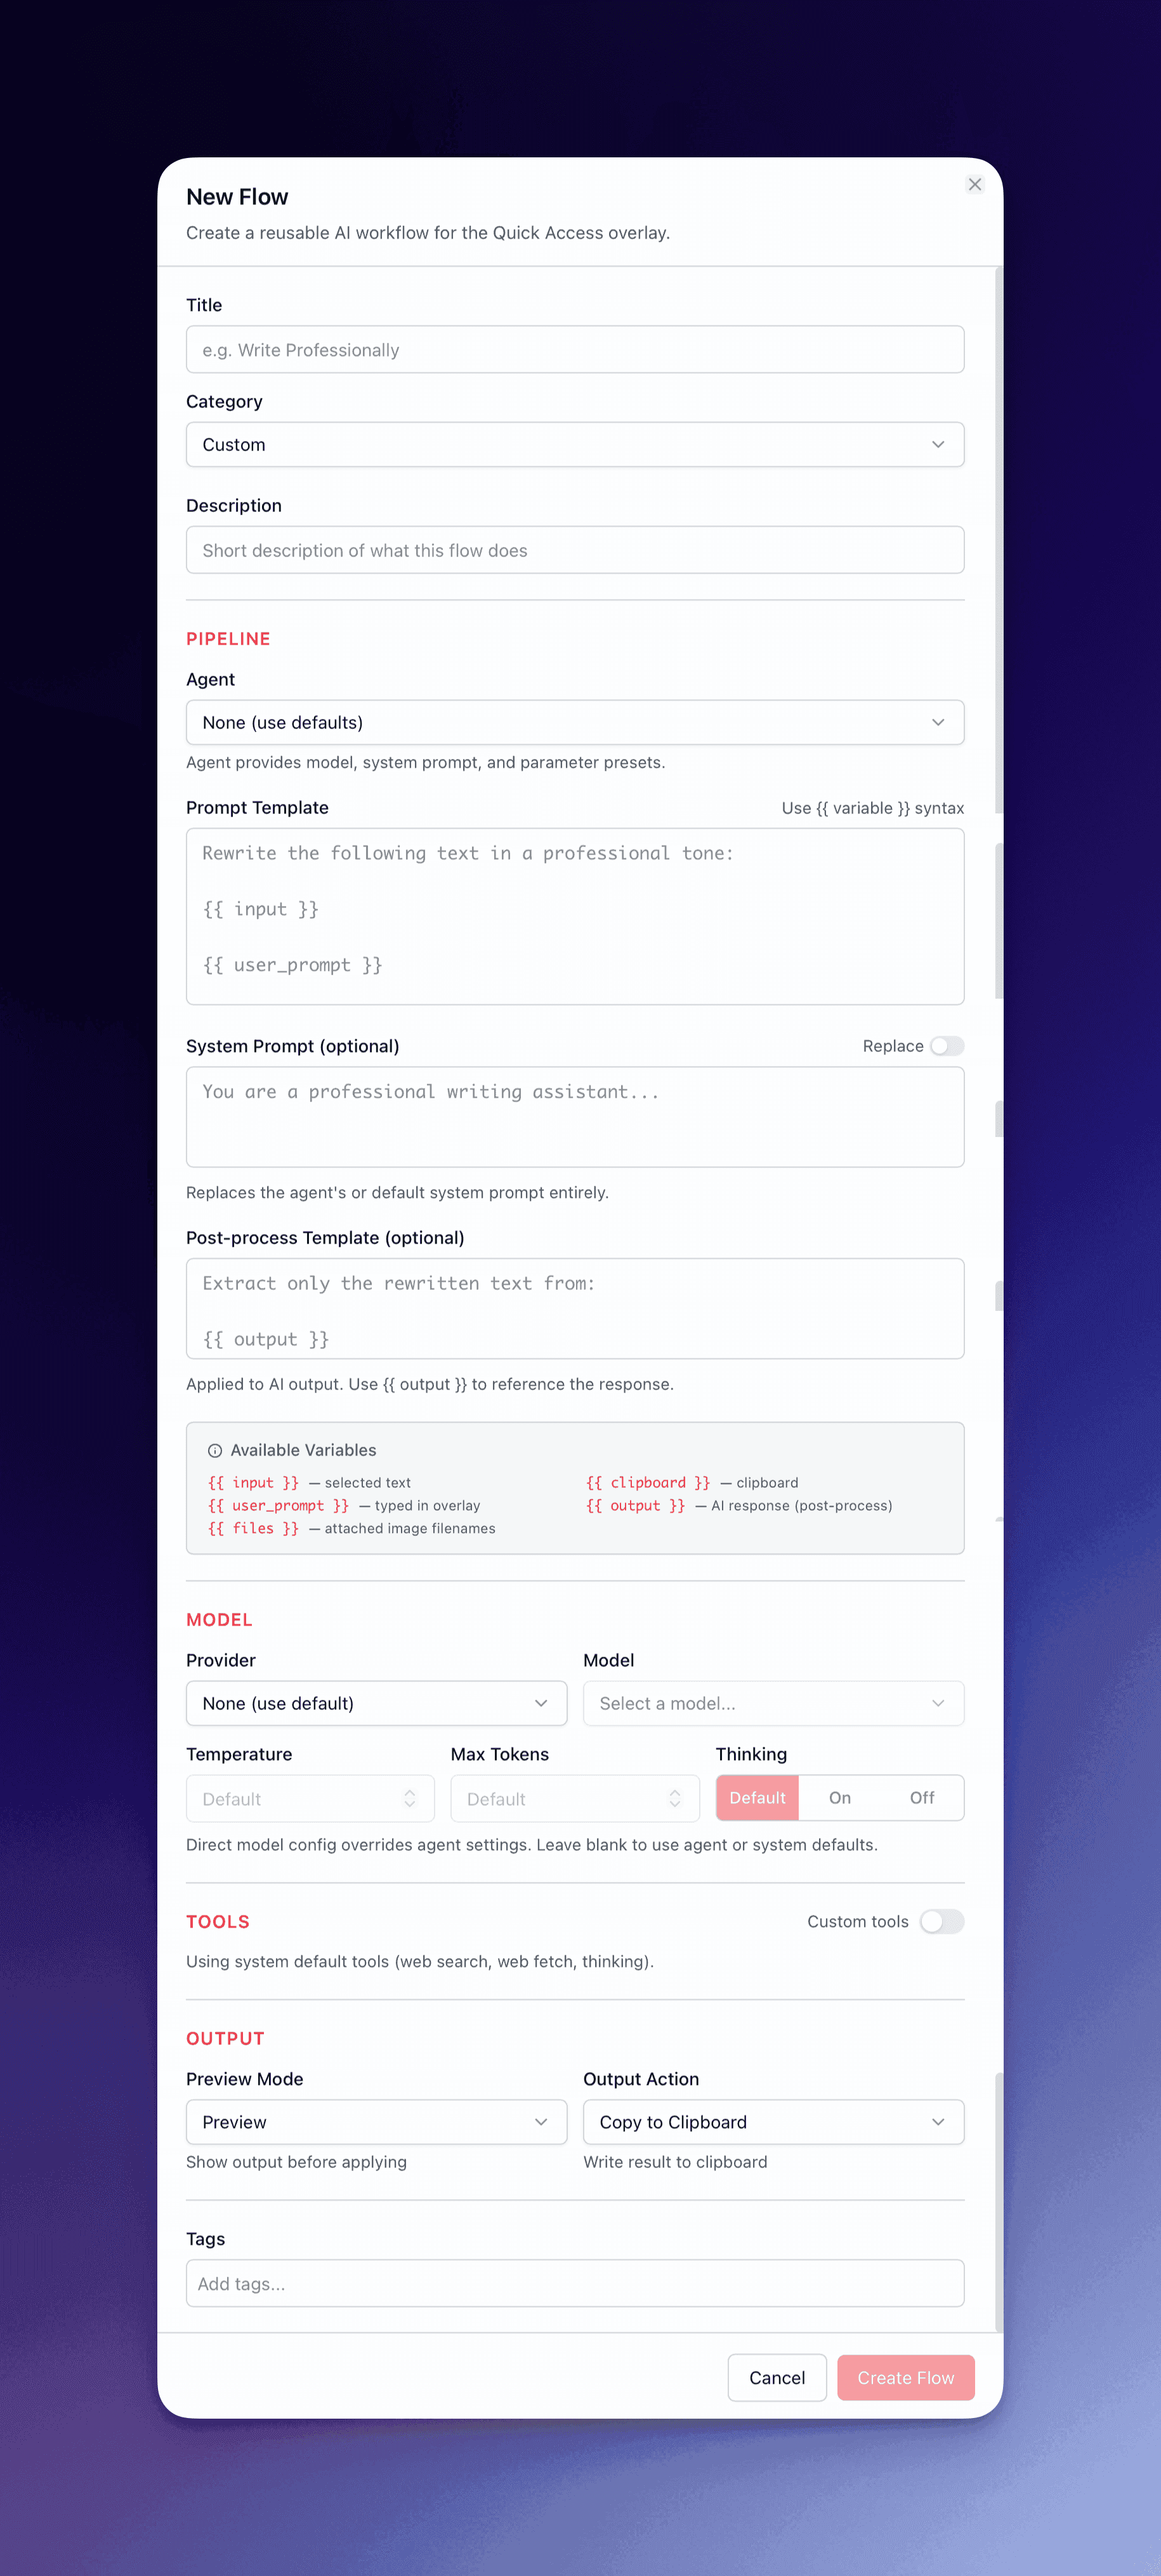
Set the title and description
The title appears in the flow picker and search results. Keep it action-oriented: “Fix Grammar,” “Summarize,” “Explain Image.”
The description appears below the title in the flow picker. One sentence explaining what the flow does: “Correct spelling, grammar, and punctuation errors in selected text.”
-
Write the content template
The content template defines what gets sent to the model. Use {{ input }} where the selected text should go:
Rewrite the following text to be 40% shorter while preservingall factual claims. Maintain the original tone. Return onlythe rewritten text.{{ input }}For vision flows that process images, use {{ files }}:
Describe and explain the attached image(s) in detail.Attached: {{ files }}The template editor detects variables and displays them as chips for reference.
-
Write the system prompt
The system prompt tells the model how to behave. Be specific about role, constraints, and output format:
You are an expert editor who improves text clarity and readability.Output only the improved text with no explanations, preambles,or commentary.Choose the prompt mode:
- replace — Override any agent system prompt entirely (default for flows without an agent)
- append — Add to the agent’s existing system prompt (default when an agent is assigned)
For flows that delegate to an agent (like Research flows), you can leave the system prompt empty and let the agent’s own prompt handle everything.
-
Choose the model
Each flow can specify a provider and model. Match complexity to the task:
- Fast models (Gemini Flash, Grok Fast, GPT-4o mini) — Grammar fixes, formatting, short transforms. Sub-2-second response.
- Standard models (Gemini Flash with thinking, GPT-4o) — Summarization, code review, content generation.
- Reasoning models (Gemini Pro, Claude Opus, o1) — Complex analysis, multi-step research, security audits.
If you leave provider/model empty, the flow uses your default overlay model.
-
Select the output action
Match the action to how you will use the result:
- paste — Transform flows where you want the result in place (grammar fix, rewrite, translate)
- copy — When the result needs to go somewhere other than the source (vision extraction, web data)
- insertBefore / insertAfter — Keep the original text and add output adjacent to it
- openInChat — When the result is a starting point for iteration (research, analysis, blog drafts)
-
Set the preview mode
- diff — For transform flows where you need to see what changed. The built-in writing flows all use this.
- preview — For analysis and generation flows where output varies. Review before the action fires.
- none — For research flows that open directly in chat. No confirmation step.
-
Assign a category
Categories organize flows in the picker. The default categories include Writing, Analysis, Generation, Code, Vision, Web, and Research. You can create custom categories — they appear alongside the defaults.
-
Configure tool access (optional)
Most text-transform flows need zero tools. Research flows might need web search. Code flows might benefit from file system access. Grant the minimum tools required — fewer tools means faster execution and more predictable results.
If an agent is assigned, the flow can inherit the agent’s tools, or you can override with a custom tool selection.
-
Test and save
Run the flow with representative input before saving. Check that the output format matches expectations, the output action works correctly, and the response time is acceptable.
Mark flows you use frequently as favorites — favorites appear pinned at the top of the flow picker and in the overlay.